1.4. Kafka Connect
1.4.1. Multiple Connect Clusters
A scenario often found in development environments is the use of multiple Connect Clusters within a single Kafka cluster. In our experience, Kafka Connect in its early iterations wasn’t well guarded against misbehaving connectors —such as connectors in their development phase. As such a connector could bring Connect down, hence the need for multiple Connect Clusters.
Fast Data CSD supports such setups but, due to the limitations of the CSD specification, some manual adjustments by the Cloudera Cluster administrator are needed.
You can add an extra Kafka Connect cluster to your setup by adding an extra Fast Data service which only contains Kafka Connect roles and adjust manually the bootstrap servers, schema registry URLs and zookeeper quorum (if needed) to point to your main Fast Data service Kafka Cluster.
Adding an extra Kafka Connect cluster should only take a few minutes of your time. Please note that monitoring of this extra cluster maybe limited.
1.4.1.1. Setup an extra Connect Cluster
To setup an extra Connect Cluster start by adding a Fast Data service:

Add a Service to your Cluster

Select a Fast Data service.
Add only Kafka Connect Distributed instances to the new service:
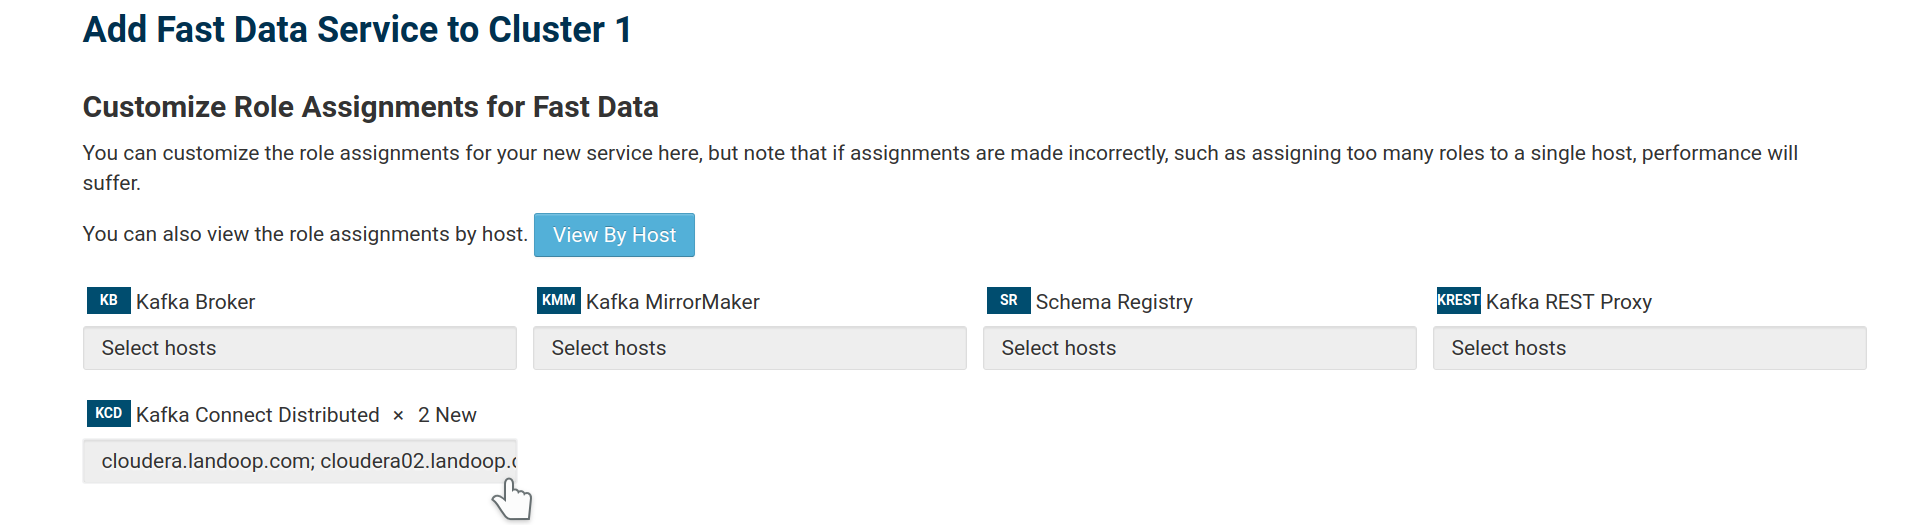
Adding Connect roles for the service.
In the Express Wizard (Review Changes) you have to setup the new cluster to use your default Fast Data service.
If you did change your ZooKeeper Root in your main Fast Data service that will provide the brokers, adjust it here as well.

Set the same ZooKeeper Root as your default Fast Data service.
Provide a unique log id for your service. It can be any string, usually it is enough to copy the service number (here 3 from
Fast Data-3).
Set a unique log.id
Optionally change the brokers’
log.dirs. As this service won’t use brokers, this change isn’t really needed but it can act as an important safeguard in case someone accidentally add broker roles to the service.
Set unique log.dirs for brokers, in case someone later adds broker roles.
Set the bootstrap servers for your Connect workers. As you probably know, you don’t have to add all your brokers to this list, just a few the Connect workers can connect to upon startup, to download the full list.

Set the bootstrap servers to your main Fast Data service brokers.
Set the Schema Registry URLs to one (or more) of your main service’s Schema Registry instances. The schema in the URL (in the example
http) is mandatory. If you want to add more than one Schema Registry instances for load balancing and redundancy, separate the URLs with a comma (e.ghttp://registry-01:8081,http://registry-02:8081)
Set the Schema Registry for the key converter.

Set the Schema Registry for the value converter.
Finally add a suffix for Connect’s system topics. This is very important because Connect stores its data and configuration into Kafka. If you leave the suffix the same as your main Fast Data service, your brokers will be part of its Connect cluster, thus you will end with one larger Connect cluster instead of two separate ones.

Set a unique suffix for Connect’s topics.
Once you wrap up the Add Service wizard, you will probably find that there are some issues with your cluster. There is no reason to be alarmed; the new Connect instances use the same ports as the old ones, it is easy to fix.
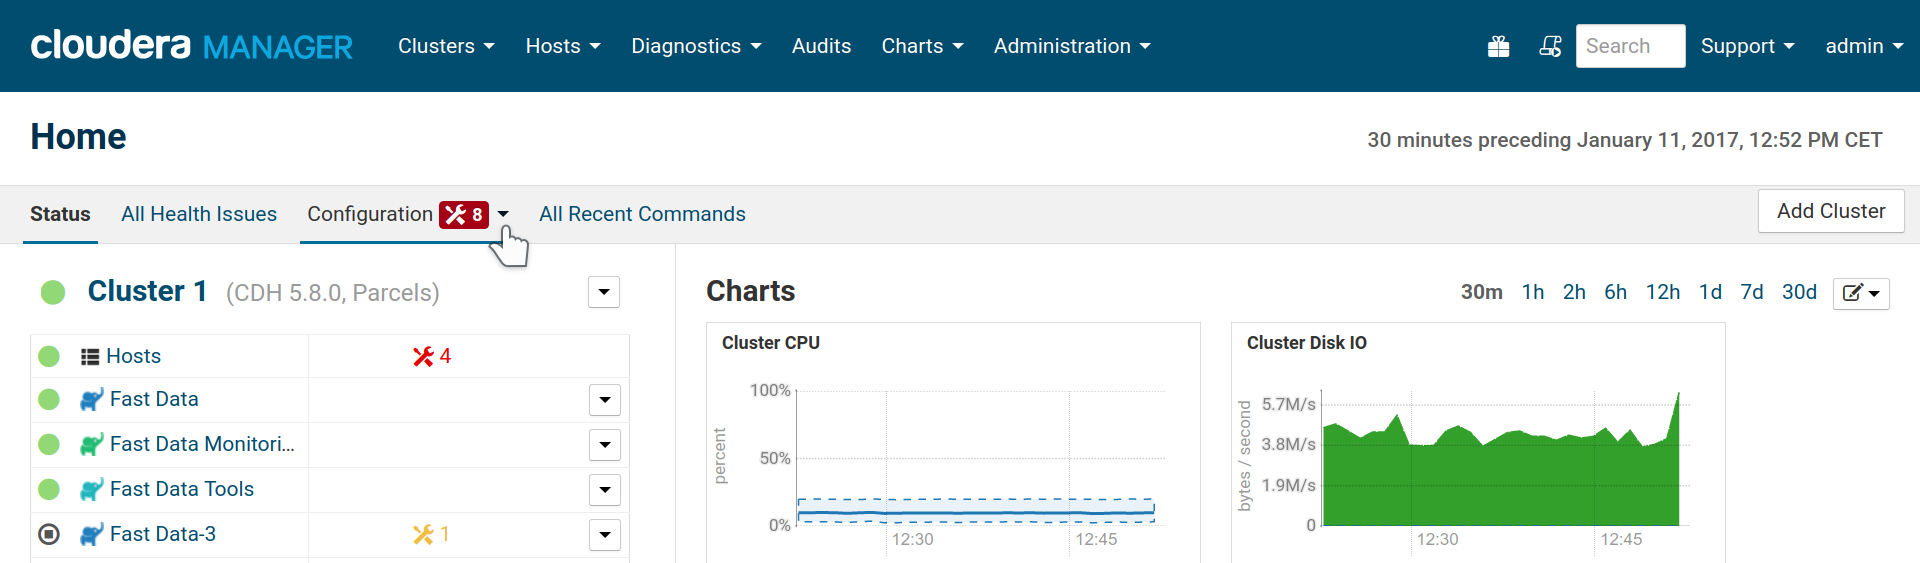
Cloudera Manager detected errors in our configuratio.
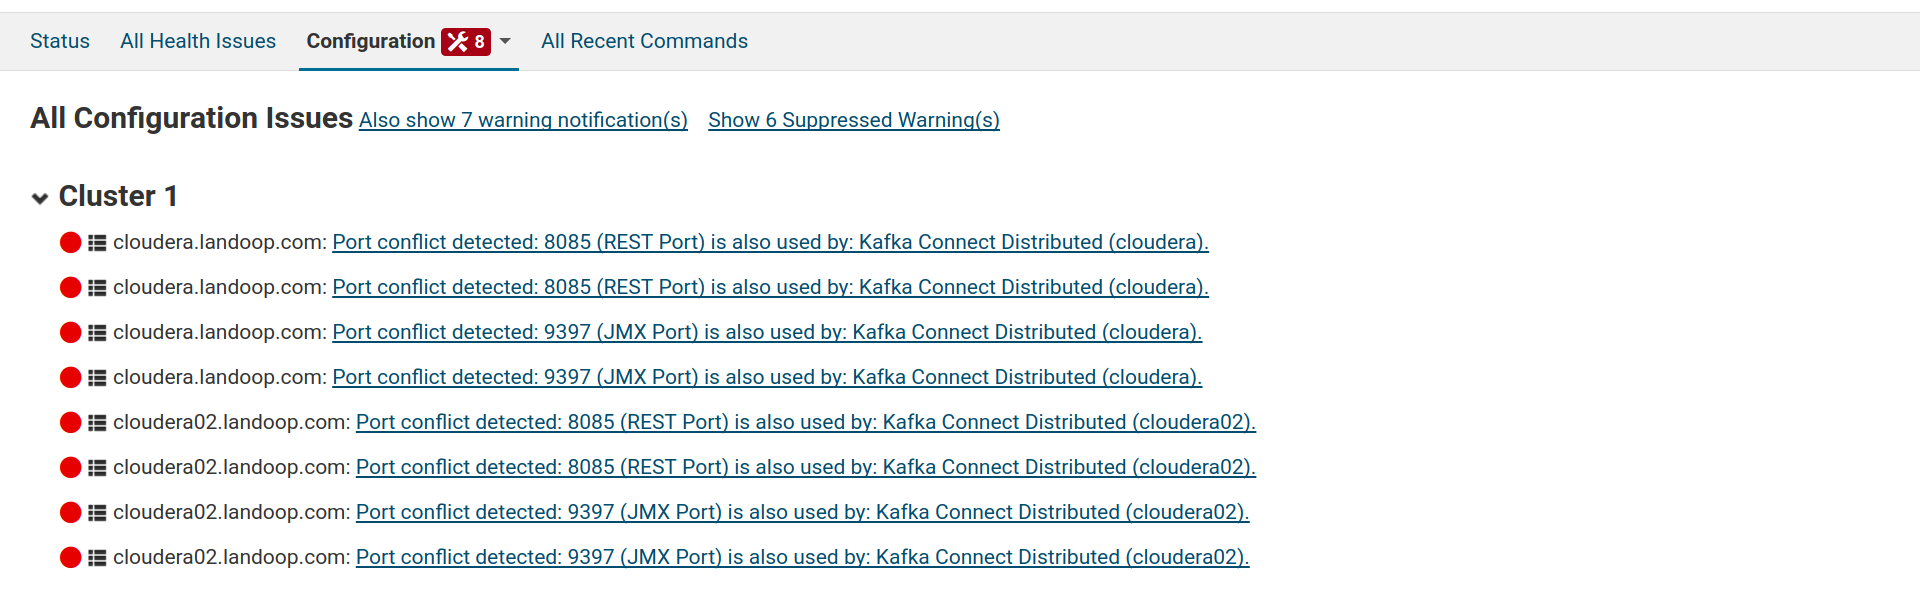
Cloudera Manager identifies the issues as port conflicts.
To fix these issues, visit the configuration page for your new Fast Data Service
and adjust the service-wide settings fd.connect.listener.http.port and
fd.connect.listener.https.port. Then select the Kafka Connect Distributed
scope and the Ports and Addresses category and adjust Connect’s JMX port
(jmx_port).
You are ready to start your new Connect cluster.
1.4.1.2. Removing an extra Connect Cluster
To remove an extra Connect Cluster it is enough to stop and delete the Fast Data service that manages it. However it is prudent to perform a cleanup of its system topics in Kafka, in case you want to setup a new cluster with the same suffix in the future.
The topics you have to delete are connect-configs<SUFFIX>,
connect-offsets<SUFFIX> and connect-status<SUFFIX>. You can also stop
the service, remove these topics and, when sure that Kafka removed the topics,
restart the service in order to reset your Connect cluster.
1.4.2. User Defined Connectors
An addition since our 3.0 CSD is the ability to configure your own custom connectors for use with Kafka Connect.
In order to use this functionality, you have to add your connectors to the same
path for all Connect Distributed hosts and make sure they are readable by
everyone or at least by the fastdata user.
The next step is to set Connect’s plugin.path from the CM configuration UI.
Please check Kafka KIP-146
for information on how to use the plugin path setting. In short if your connector
is a single jar, it should be placed at the top level of a directory set in plugin.path.
If your connector has some dependency jars as well, they all should be placed under
a subdirectory if a directory set in plugin.path.
As an example, if you made your single jar connector-1 available at
/opt/connectors/connector-1.jar and your connector-2 with its dependency jar available at
/opt/connectors/connector-2/connector-2.jar and /opt/connectors/connector-2/dependency.jar,
you would set Connect’s plugin path to:
/opt/connectors

Adding custom connectors to Connect Distributed’s classpath
Note
For our customers we can package their desired connectors into parcels or provide templates they can use to build their own connector parcels, compatible with the Fast Data CSD.
1.4.3. Stream Reactor Connector Parcel
Since our 3.0 release, the FAST DATA CSD supports external parcels that provide connectors. Our first batch of connnector parcels are for Datamountaineer’s Stream Reactor, which is an ever-expanding collection of Kafka Connectors (26 and counting).
To add these to your cluster, you should visit the parcel page of Cloudera Manager, press the configuration button and add the parcel’s URL. The current list of parcels for Kafka 2.3.x are:
Once a parcel repository is added, it will be available to download and install to the cluster. Once you activate it, restart Connect Distributed and the Stream Reactor connectors will be available for you to use without any need to set a custom classpath.
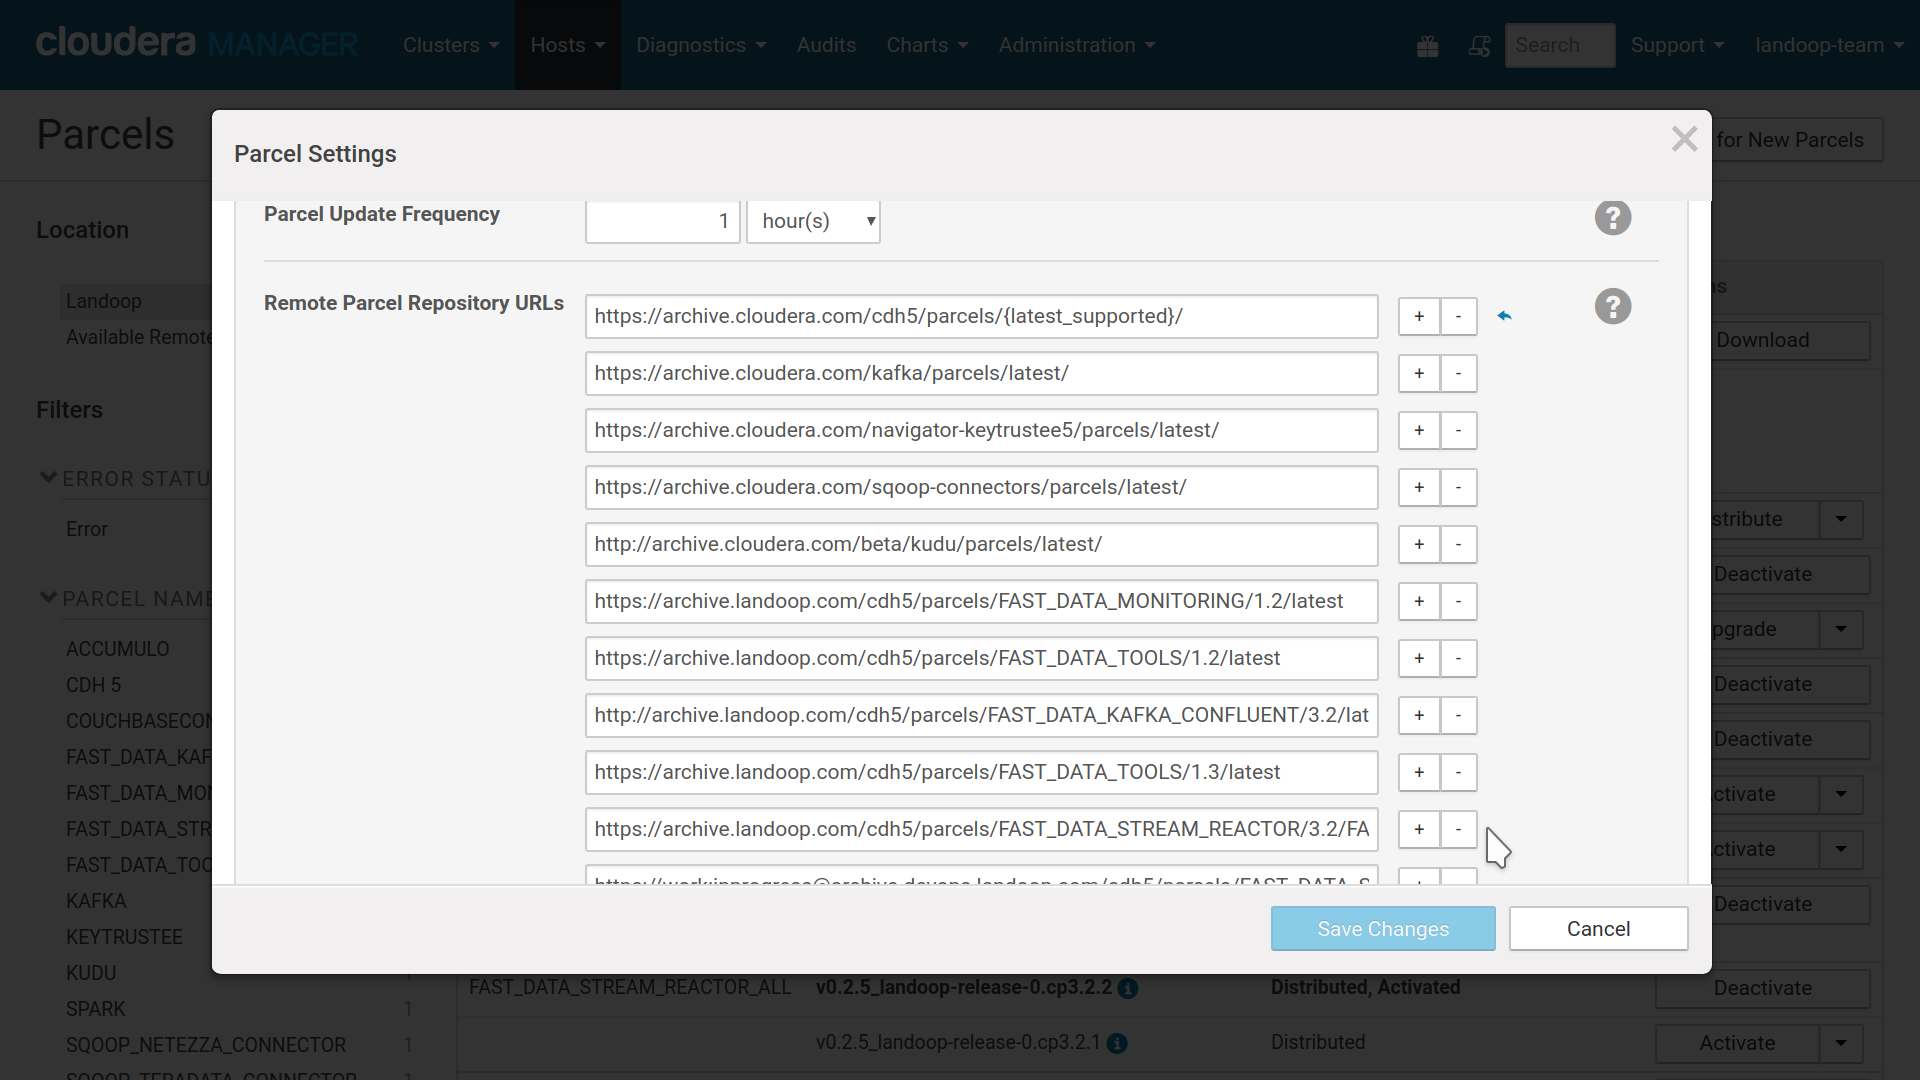
Adding Stream Reactor’s parcel repository to Cloudera Manager

Landoop’s Stream Reactor parcel activated
Important
Please note that the reason we provide separate parcels isn’t for size, the ALL parcel is actually quite compact. The reason is that due to the way Connect loads the connectors and their classes, some times you end up with Java class shadowing issues and unexpected problems.
Thus we advise to use the ALL package to evaluate the offering and once ready to move to production, only use the parcels you do need.
Unfortunately, since if you enable a connector parcel, it will be available to all your Connect clusters, it is rather impossible to have some combinations of connectors installed. We do work actively with Datamountaineer to prevent such issues and planning on some CSD side solution, to expose to each Connect cluster only the connectors that matter to you.
Important
For the Stream Reactor connectors it is important to match exactly the build to the Kafka version in use. Thus for Confluent Platform 3.2.1, a Stream Reactor build for 3.2.1 (and not for 3.2.0 or 3.2.2) should be used. We make sure to release a matching versions for our releases, but if installed manually (e.g to a cluster without internet access), or any other reason for a version mismatch (e.g the cluster administrator upgraded Kafka but not Stream Reactor), Connect may not be able to start with no apparent reason.
1.4.4. Connector Parcel Builder
Our Parcel Builder is an easy way to convert your connectors to a parcel for easy distribution across your cluster.
To use it, upload your connector’s JAR files, set a name and a version and press Build Parcel. If you choose to host your parcel in our server, please keep in my mind that it may be deleted anytime. In that case just re-build it.
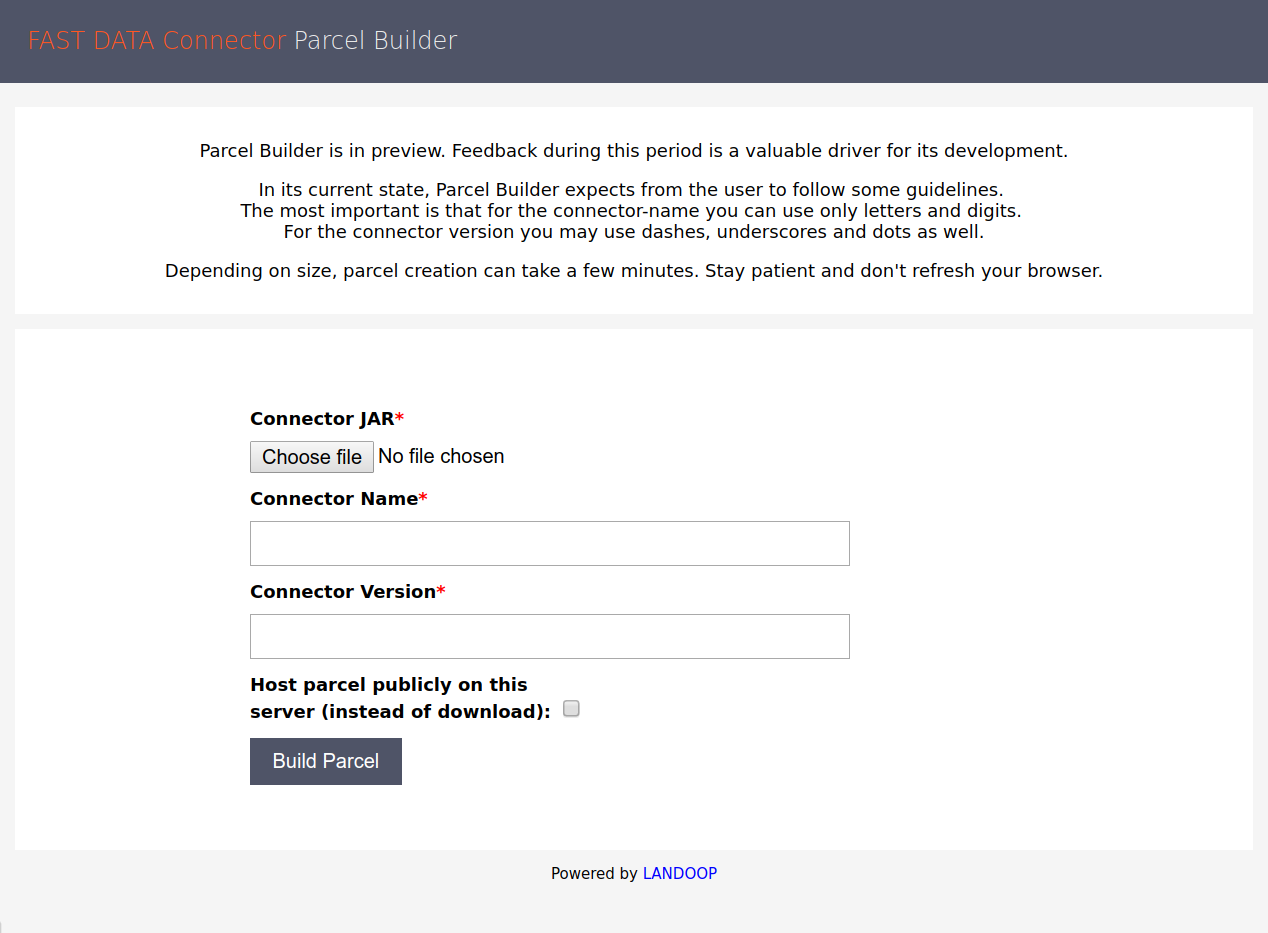
Parcel Builder lets you convert your Connector to a Parcel with one click.